Google Meet offers a comprehensive set of tools and features for presenting and screensharing content in a meeting, regardless of whether you’re joining from the web, mobile or a meeting room. This guide explores everything you need to know to deliver presentations confidently and keep your audience engaged, from the different screensharing options to annotating content directly from the Google Meet interface and hosting interactive whiteboarding sessions.
Read on to discover the key features for presenting in Google Meet; or jump to the section that best suits your setup.
Presenting from the web
Screensharing options
There are multiple options for sharing your screen in Google Meet on the web. Depending on your needs and the context of the presentation, you can choose to share your entire screen, a specific window or a single Google Chrome tab.
Sharing a browser tab offers the most control and privacy, ensuring your audience sees only the relevant content whilst keeping everything else on your screen, such as other tabs, applications and notifications, hidden. It also provides the smoothest video playback and is the only option that enables you to share audio from your presentation, making it useful for sharing videos in meetings. Should you need to switch tabs during your presentation, simply open a different tab in Chrome and click “Share this tab instead” without needing to first navigate to Google Meet.
💡 If you navigate away from the main Google Meet tab, picture-in-picture mode will automatically launch to keep your meeting, presentation and other participants in view.
If you want to screenshare content that is outside of your browser, such as an application or file, consider sharing a specific window or your entire screen. Sharing your entire screen can be particularly useful for training and onboarding new team members who need to see exactly what you’re working on. It is also ideal when you’ll be frequently switching between applications, windows and tabs, as it eliminates the need to constantly adjust what you’re sharing in Google Meet.
Each screensharing method has its advantages, so choosing the right one depends on the context of the content you’re presenting and how you want your audience to experience it.
❗ Keep in mind that when sharing a specific tab, you may not be able to share content outside of the browser, depending on your operating system, and certain elements, such as dropdown list options, may not be visible to your audience.
Scroll and zoom in and out of presented content

Need to adjust the view of your screenshared content to help your audience see it better? Instead of navigating to another tab, you can scroll and zoom in and out of your presented content directly from the Google Meet interface. This enables you to control the view of your content in Meet, such as Google Docs, Sheets and Slides files, or many other types of content, without losing sight of your audience.
💡 To control your presented content in Google Meet, you must be sharing a specific tab rather than a window or your entire screen. Your audience can also adjust their view of presented content from their own device.
Annotate presented content
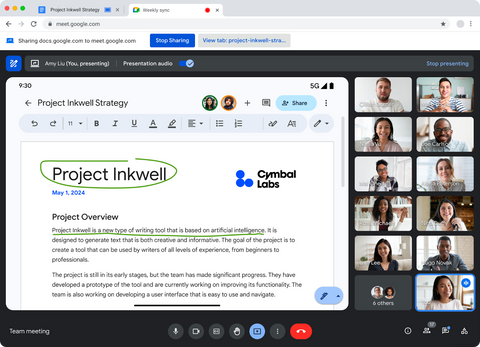
If you need to illustrate a point or draw attention to a particular part of your screenshared content, the annotations feature in Google Meet can help. It lets you draw and add text, stickers and shapes directly onto your presented content from the Google Meet window.
As soon as you start screensharing, you’ll gain access to a menu with a wide range of annotation tools including a pen, disappearing ink, text box, stickers, shapes and more. You can use these tools directly on top of files such as Google Docs, Sheets and Slides, or any other web page in your browser, to highlight key content and keep your audience focused.
Need a helping hand? You can appoint co-annotators who can also mark up your screenshared content from the web, mobile devices and touch-enabled Google Meet Hardware such as the Google Meet Series One Desk 27.
Control Google Slides presentations in Google Meet

Controlling your Google Slides presentation from within Google Meet allows you to see your content, controls and audience all in one convenient place. It means you don’t need to worry about switching tabs between audience and presentation or interrupting your flow to move on to the next slide. This provides both you and your audience with a more seamless and engaging presentation experience.
You can navigate through the presentation, jump to a specific slide, start and stop media, view speaker notes and quickly share access to the file with attendees – all from the Google Meet interface. You can even appoint co-presenters who have access to the same controls, along with the speaker notes, making presenting together easier and eliminating the need to ask someone else to move onto the next slide.
💡 When you paste a file link 🔗 into the meeting chat – whether it be a link to a Google Docs, Sheets or Slides file – a pop-up will appear prompting you to share it with all attendees. You can even choose to attach the file to the 📅 Google Calendar event directly from Google Meet.
Speaker spotlight

The speaker spotlight feature lets you insert your live video feed directly into a Google Slides presentation and share it during a Google Meet call. This means your audience can clearly see you alongside your content, helping them stay engaged and focused throughout your presentation. It mimics the behaviour of an in-person presentation, creating a more interactive and dynamic experience.
With speaker spotlight, you have full control over the position, size and shape of your video feed on the slides, ensuring it perfectly complements your presentation’s design without obstructing key content. If you are co-presenting with other participants, you can switch to another person’s camera feed during a Google Meet call by allowing them to take over the presentation.
Present from Google Docs, Sheets or Slides
If you want to share a document you already have open, you can present directly from a Google Docs, Sheets or Slides file into a Google Meet call. This enables you to view your content and the meeting in one tab whilst you present, making it easier to collaborate and edit the file as you discuss it in real-time without switching between applications.
To ensure everyone in the meeting has access to the necessary context and materials, you can choose to share your presented file with all or select participants via the in-meeting chat directly from Docs, Sheets or Slides. This saves you from navigating to Google Meet and helps participants follow along, keeping the discussion focused and minimising file-sharing interruptions.
Presenting from mobile
If you’re joining a Google Meet call from your mobile device, you can easily share your phone screen with everyone in the meeting by tapping “Share screen” to show apps, documents or anything else on your device. You can also share your phone’s audio, which is useful for videos or presentations with sound. If you prefer, Google Meet gives you the option to join the meeting just to present, meaning only your phone screen will be shared in the meeting without your camera or microphone on. Plus, if you’re using a mobile device, you can annotate directly on top of screenshared content.
Presenting from a meeting room
In meeting rooms equipped with Google Meet Hardware, there are multiple ways to share content both inside and outside of Google Meet calls.
HDMI content sharing
In rooms that support it, you can connect your laptop to the meeting room’s HDMI cable to present both locally to the room or to a Google Meet call. Once you’ve connected the HDMI cable, press the Present button on the touch controller to share your screen and audio with the local room (if you’re not yet in a meeting) or with all participants (if you’ve joined a meeting).
💡 If you’re using a Google Meet Series One Board 65 or Desk 27, connecting your device via USB-C allows you to use the touchscreen device as a second monitor for local content sharing or simply as an extended desktop when you’re not in a meeting.

With native Zoom and Google Meet interoperability, you can also use Google Meet Hardware to present content into Zoom meetings and use Zoom Rooms to present content into Google Meet calls. This makes it easier to connect and share key information with clients, partners and colleagues across video conferencing platforms without barriers.
Wireless content sharing
Whilst joining a call from a meeting room, companion mode enables you to use a second device, such as a laptop or mobile phone, to access the same interactive Google Meet features (including hand-raising, in-meeting chat, Q&A, screensharing and more) as participants joining remotely. It enhances meeting equity by enabling everyone to participate equally.
Once you’ve joined a meeting via companion mode, you can share your screen from your device for a quick and convenient way to wirelessly bring relevant content into the call, eliminating the need for cables cluttering the space. If there’s something already being shared on the meeting room display, you can also use your personal device to view – and zoom in on – presented content to get a better view.
📖 Read our Complete Guide to Google Meet Companion Mode to learn more about what you can do in companion mode, when to use it and how it makes hybrid meetings more inclusive.
Digital whiteboards
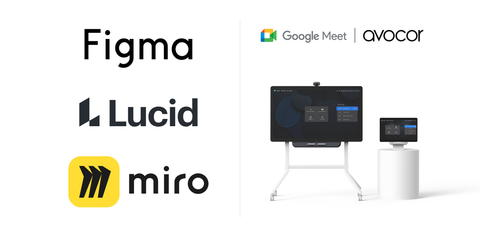
Looking for a more fun and interactive way to share ideas and collaborate with your team in meetings? The Google Meet Series One Board 65 and Desk 27 allow you to host digital whiteboarding sessions directly on your meeting room device using third-party applications FigJam, Lucidspark, and Miro.
These applications are installable on both Board 65 and Desk 27 and work inside and outside of meetings. This means you can launch a session during a Google Meet call via the “Activities” tab, allowing both in-room and remote participants to contribute in real-time, or start a local session by pressing the “Start a whiteboard” button on the meeting room device's home screen.
Once you’ve initiated a whiteboarding session, you'll have access to a wide range of interactive tools that you can use on Board 65 and Desk 27, including voting, templates and comments, helping you and your team bring ideas to life and achieve more together during meetings.
💡 You can also use FigJam, Lucidspark, and Miro directly inside Google Meet calls on the web, as well as with other Google Workspace applications like Google Calendar, Drive, Docs, Sheets, and Slides.
Physical whiteboards

Scribe works with any whiteboard surface and is compatible with all Compute-based Logitech Room Solutions for Google Meet. It automatically detects both written and other forms of content placed on a whiteboard, such as sticky notes, and enhances their colour and contrast to ensure everyone can get a clear view.
Discover more Google Meet tips & tricks
By leveraging these features and adapting them to fit the needs of your meeting, you can create dynamic presentations that capture your audience’s attention and make content easily accessible.
Looking for more Google Meet tips? Take a look at some of our other posts here on the Gecko blog for helpful features and insights to enhance your meetings!